English

Showing posts with label Nails. Show all posts

Friday, July 4, 2014

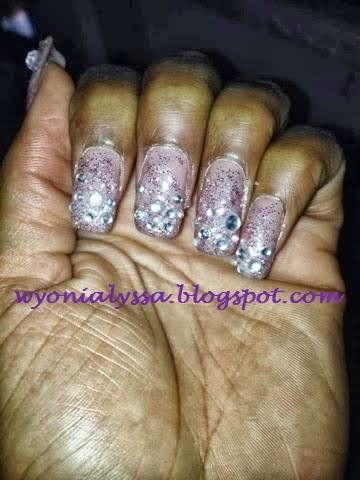
Bridal: Silver, White & Pink accents


Organic Nails: Ultra White, Clear, Delight. Pink hearts and pearls

Acrylic: Red Glitter Almonds


Organic Nails: Red & Clear. Red glitter

Wednesday, June 18, 2014

Acrylic 3D: Strawberry Love


Since my last design included pink and turquoise I wanted a totally different color this time with some 3D. So normally I would advice clients to do a fill every 2-3 weeks, but didn't follow my own advice this time as I had to study for exams. This design took a bit longer since I had to remove way too many air bubbles. I am still happy with this design now that they're finished. Since I didn't own a red glitter and a leafy green acrylic yet, I had to custom mix those. Btw I love making my own mixes as I can really create a color to go well with for example a prom dress. Not a lot of technicians do this while I think they should. Still trying to perfect my reverse application style. 

Products used:

  • Acrylic crystal clear
  • Petal (Bride collection)
  • Red glitter mix: red acrylic, fine true red glitter, fine strawberry red hologram glitter, Crimson Glam (Inaz - fine glitter/pigment) & big red hologram hexagon glitter 
  • Green mix: blue acrylic, yellow acrylic, acrylic ultra white, real beige, soft gold

Note:
All products are from Organic Nails unless otherwise stated


What do you guys think of fruit themes nails? Let me know by commenting below

Xoxo Wyoni

Saturday, June 7, 2014

Acrylic 3D: Shimmer, Shine & Neon


Yay finally had my first client in Holland past Thursday, my mini me's mom. Last week we were talking about acrylics, Dutch salons and the nail courses I did in Monterrey. She decided to schedule her next appointment with me as she liked the way my current nails looked. We ended up talking about the design I would do for her, it would include glitter, rhinestones and neon 3D.


On the day itself I decided to take off her old set as I spotted too many air bubbles. There's no better way for her to see what I can do and really evaluate her new nails when I do them from scratch.

Products used:

  • Creamy white
  • Pink
  • Glitter pink mix: Essence - glitter, Maybelline - glitter, pink, Petal (bride collection)
  • Neon rose
  • Neon turquoise mix: neon blue, turquoise, neon pear
  • Neon orange mix: yellow, neon rose, neon yellow
  • Rhinestones 

Note:
All products are from Organic Nails unless otherwise stated

What do you guys think of this design? Let me know in the comments below

Xoxo Wyoni 

Monday, May 26, 2014

Acrylic 3D: Baby Pink And Silver


As I will leave mexico upcoming Tuesday I offered to do my friends' nails if anyone wanted to. So last friday I did Karla's nails as she passed all of her exams and would graduate this semester. She told me that she would love for me to do an enhancement for her as she would have a graduation ball next Friday. 

At first her dress was going to be turquoise, but she changed it last minute to a pink dress. Since I didn't have any pinks I decided to custom make the color for her to match the dress below. Since I had to mix this based on the picture I showed her the mixture as if I were to apply it to double check it was the correct color. 


Products used:

  • Pink mix: red, metallic pearl, ultra white, neon pink, yellow
  • Pink
  • Delight (Euphoria collection)
  • Ultra white

Note:
All products are from Organic Nails unless otherwise stated

I hope you guys like this simple look as much as I, my friend and her mom do. Until next time.

Xoxo Wyoni 

Tuesday, May 20, 2014

Acrylic Color block: Purple, Turquoise and Glitter

So the nail design I showed you in the last post really had to go as I sadly broke one nail and had to do a refill as well. Was sad about it at first as I really liked the gradient, but I have so many colors that the sadness went away quickly. The number one problem I always have when needing a new set is…what design will I put now and more specifically with which colors. The more options the more difficult to choose. 


Since I didn't know what most of my colors looked like, I decided to first swatch all of them on these nail wheels. To make it more easier for future reference I decided to split them into groups (collections, original colors, and a wheel with self made mixes. And then I still couldn't choose so I asked my roommate which ones she liked after I told her I would use at least two colors. She chose turquoise and purple, but I felt like those needed something else (perhaps some glitter ^_^). I quickly grabbed two glitters and came up with a design for each nail to keep me focused. 


Products used:
  • Turquoise (organicolor)
  • Purple (organicolor)
  • Delight (euphoria collection)
  • Rock star (glitter)
  • Petal (bride collection)
  • Clear acrylic

Note: 
All products are from Organic Nails unless stated otherwise 

This week I will have my first client since taking the nail course, can't wait to show you the results.

Until then xoxo,

Wyoni 

Wednesday, May 14, 2014

Acrylic Glitter Gradient : Water & Ice


During my nail course I had to do gradients with glitter and had two nail designs that I really liked. So when it was time for me to do my nails again I decided to just combine them and this was the result. 

Products used for this look:
  • Petal (Bride collection)
  • Nirvana (Euphoria collection)
  • Jollity (Euphoria collection)
  • Delight (Euphoria collection)
  • Dinner (glitter)
  • Clear acrylic
  • Holographic glitters

Note:
All products are from Organic Nails unless otherwise stated

I was going to use fruit fimo instead of the holographic glitters to give the illusion of cocktails, but the store was out of those at that time.

I really love this look and happy that I decided to do the design like this though. The new reverse technique is something I have to get use to though so it took me way longer than usuall to do my nails. I guess practice makes perfect huh. I do understand why this technique is preferred over the classic one especially when working with glitters. You get way cleaner lines with reverse application. 

My new goal will be to conquer this technique and sculpting as almost no one from back home does this.

Xoxo Wyoni

Thursday, November 21, 2013

CLAIRE'S GLITTER SAND NAIL POLISH - NUDE

Hello everyone. How have you been? I’ve been so busy trying to arrange things for Mexico. I’ve had some vaccinations already and felt really tired the entire week and combined with some muscle aches is not helping at all. Muscle aches you ask… yep I’ve finally started training again and it’s one of the worst feelings ever, realizing that you’ve basically lost all of your muscle power. But I will regain it again one day and till then I will focus on other things. I’m thinking about just also posting about my day to day rambling as I feel like they just don’t fit into other posts such as in this one lol. Anywho...Let’s have a look at my manicure shall we..


Sooo anyway this is the color I’ve been wearing for the past three days, it’s from the company Claire’s and as the polish bottle shows that it’s one of their glitter sand polishes. I really like these kind of textured polishes and this is no exception. If you can remember I bought this a while ago on sale with some other beauties, one of which was a seafoam-green sand polish from the same brand.

This polish is so beautiful, looks like it actually sparkles in the light probably because of the silver glitter that’s mixed in. The color is a light nudish (don’t even know if this word exists..haha) pink. It’s the most wearable shade of the three Claire’s sand polishes I currently have. I even got this for my friend who actually didn’t like textured polishes, however she loved the effect of the seafoam green one and I therefore picked up this one for her as she’s more into those natural colors. 

For this manicure I’ve used three coats although two would’ve been sufficient. I just didn’t like the way it looked on my index finger as that one really needed an acrylic refill. That nail actually bend in the wrong direction today so I had to refill them asap today.

For some reason Claire’s doesn’t name their polishes which kinda sucks as I like being able to quickly find brands and colors online. Oh well guess we’ll just have to deal with it and use peoples swatches to find the correct colors.

Have you purchased any textured polishes yet? Do you think I should also ramble about day to day life, even picture-less posts? Let me know by leaving a comment below.

Xoxo WyoniAlyssa

Thursday, October 31, 2013

NAIL ART | SPIDER WEB AND ORANGE GLITTER


Hello everyone how are you doing. Hope you're having an awesome Halloween party night even though it's Thursday. I've been dying to upload this nail art as soon as I saw it at Robin Moses' YouTube channel this week (you should really watch her beautiful nail designs). I basically removed my previous design immediately, but just couldn't take pictures as I came home after sunset. Today was the same problem again, but I just had to upload it anyhow. I tried to lighten them a bit so they became as realistic as possible. I also totally forgot to use some moisturizer before taking these, so please excuse the dry hands.


Manicure Details*

Index finger, middle finger and pinkie: 

  • 1 coat of China Glaze - Sun Worshiper (too neon for this look)
  • 1 coat of China Glaze -  Papaya Punch
  • 1 coat of Hema - Clear polish mixed with Inaz - Pennywise Glam
  • Gradient with Herome - St. Moritz
  • Black acrylic 

Thumb and ring finger:

  • 1 coat of Hema - Black 
  • 1 coat of Herome - St. Moritz
  • Acrylic paints - Silver and white

*Seche Vite topcoat was used on all nails

One of the worst scenarios when working with glitters is of course when the container drops out of your hand and sadly I experienced this. I should be thankful though that in fell onto the plate I was working with, so I was at least able to scoop more than half of it back into the container. Because of this drama the black nails needed another coat as the orange glitter couldn't wait to stick to those nails. I felt like Sun Worshiper was way too bright for this look (duhh it's a neon), so that's basically why I used a more regular orange on top.

I really love this look as it’s quite simple to do. The orange glitter on top of a basic orange polish really makes it sparkle even more. I never knew I could paint a spider, but I think mine came out pretty good. I do have to practice with making my spider web way thinner to be more realistic, but I don’t have a  striping brush yet so my regular paint brush will do for now.

What do you guys think of this design? Have you celebrated Halloween?

Xoxo WyoniAlyssa

Sunday, October 27, 2013

NAIL ART | GREEN SCALES


Hello everyone, I hope you’re doing fine. I’ve finally received my email regarding my exchange to Mexico, but am so stressed about finding a residence. Wouldn’t be so stressful if only I didn’t have to arrange this before the end of November (I know this seems far away but it really isn’t if you’re also busy with school).

Anyway for this look I was once more inspired by one of Robin Moses’ designs, one of her collabs with anaarthur81 (I hope I got the number right, if not my apologies). Anywho they came up with this design for the TV-show “V” and I really liked the green scales that Robin did. The plan was to also try to do the face she made on the ring finger, but I didn’t have time or energy to try it so green scales it was.

Products used:

  • Black acrylic paint
  • Scraperfect - best glue ever
  • Mufe - black tango green black
  • Essence - crystalliced glitter froster (LE)
  • Seche vite topcoat
  • Inaz - clover glam
  • Green nail art foil


Overall I really like this look on my nails, something black with lots of shimmer and glitter. For next time I’ll try to topcoat the foil before I start using the acrylic paint. I should also try to remember to topcoat every other day to try to keep this looking neat for a few days. I also didn’t think I’ve used enough glitter for the design. Ah well better luck next time right.

What do you think of this look? Have you ever used nail art foil?


Xoxo WyoniAlyssa 

Sunday, October 20, 2013

HEMA - OPALESCENT 17


Hi everyone hope you’ve been doing well this past week. I’ve been quite busy as I’m trying to decide which mini laptop I should get (Mac book air maybe?). I’ve also been eyeing this Canon 600D camera as I’m kinda disliking the quality of my pictures. I know almost everyone has crappy pictures when they start a blog, but I’ve seen what difference the camera and lighting can make. I will improve, it just takes some time (and money). Anyway enough rambling...back to nails.

Even though I have a lot of nail polishes I still didn't have a simple, but elegant pearl shimmer. When I saw this on sale for just 1 Euro at HEMA I knew I had to get it. I've saved a few nail art design inspiration photos which also used a colour like this. 

Opalescent 17 is an off-white pearl shimmer nail polish that reflects pink and purple. For this manicure I've used 2 coats, you could use more though but I think you'd still see the visible nail line (VNL) so it didn't bother me. This polish did dry a bit streaky though even after a layer of topcoat. 


Do you own a classic pearl nail polish like this one?


Xoxo WyoniAlyssa

Tuesday, October 8, 2013

China Glaze Halloween 2013: Howl You Doin'

Hi everyone as most of you know this month is Halloween and of course a lot of brands have launched their limited edition Halloween products. So has China Glaze of course, a brand known for its beautiful collections. This time they brought us Monster's Ball, a six piece collection containing a texture polish, a glow in the dark topcoat and four glitters. Of this collection I got two of the glitters named Howl You Doin' and Bat My Eyes, but I'm still debating whether or not I should also get the Ghoulish Glow topcoat.

Today I'm showing you Howl You Doin, a name that cannot be inspired by anything other than the question "How you doin'?". A phrase that became famous by the character Joey of the comedy TV show Friends. Ah I absolutely loved this show, the characters (especially Phoebe and Joey) and the things that happened in their lives. I was truly sad when they stopped the show. Anyway...back to polish..

Howl You Doin is a gorgeous dark purple glitter. It's more of a reddish purple as you will see in some of the pictures. The polish has tiny bluish glitter and also these small irregular muted red glitters that sometimes even looks like pieces of foil. 


MANICURE DETAILS:


  • 2 coats of China Glaze Howl You Doin'
  • 2 coats of Seche Vite topcoat*

*Used two coats as my nails felt gritty when I just used one layer

Application was okay, but for some reason my polish seemed a bit goopy. Don't know if I just had a bad batch or what, but I'll thin it out next time with some nail polish thinner.

I absolutely love this polish and am really happy that I ordered it. This again is another dark polish and I guess I'm totally into a dark nails phase for now. I just love the vampy look of darker nails compared to the airy bubbly look of lighter colors and China Glaze's Halloween collection just feed this love. I should really show you all of my Halloween nail polishes this month don't I?


What do you think of this color? Have you ever bought a Halloween edition nail polish?

Xoxo WyoniAlyssa

Wednesday, October 2, 2013

Make Up For Ever (Black Tango) - Blue Black

Hello everyone I was a bit upset when my last nailart didn’t really worked out. I was already tired from my early shift that day and being sick, but I still wanted beautiful nails for my aunt’s party. Normally I try to swatch my regular nail polish colors back to back when the weather is nice and then just wear a nailart design for the rest of the week. Unfortunately that wasn’t an option this time.

Since I already have to take my polish off before Sunday, I decided to just do a regular mani for the rest of the week. I chose one of my loves from the brand Make Up For Ever (MUFE) from their Black Tango collection, named Blue Black. Right before our Sephora’s closed I found this gem on sale next to the Green Black which I’ll swatch another time.

MUFE’s Black Tango Blue Black is a beautiful black based nail polish that reflects dark blue shimmer. It truly appears black until you look closely in lighting, it’s basically a kinda off-black color. As I’ve mentioned in previous posts that I no longer like true black nails, I really prefer this look. See for yourself…


Isn't it gorgeous? I just love these intense nearly black colors. Just can't have enough of them really. I mean look how beautiful the blue shimmer is with the flash, but appears so neutral in the shade. 

Manicure details:

  • 2 coats of Make Up For Ever - Black Tango collection - Blue Black
  • Essence Better than Gel Nails Topcoat


Do you prefer darker nails for fall?

Xoxo WyoniAlyssa

Sunday, September 29, 2013

WHEN NAILART GOES WRONG #1

Hello everyone I almost didn´t post this as I hate how my nails look at this moment, but decided to upload it anyway. So I tried foiling for the first time yesterday and it turned out great (at first though). Had some tiny mistakes here and there (which I fixed btw) and went to my aunt's party even though I'm still sick. Didn't take pictures immediately when I was done, because it was quite late and I didn't have enough lighting. The party was fun and my nails were stunning with the foil effect. 

But when I woke up this morning.....Yuck and ....yuck again. I mean just look at the pictures and you'll know what I mean.


You see what I mean now, it"s so ugly. For some reason my black zebra stripes on my ring finger and thumb turned this dark olive army green (this was done with a true black acrylic paint O_o" ). Thought I'd used enough glue to adhere my foil on the other nails. The fixed mistakes on those nails also turned into the dark olive army green, so now you see those patches as well. 

Note to self for next time:

  • Topcoat the foil before using acrylic paint
  • Topcoat the finished design again
  • Do not rush through nailart

FYI I've used this beautiful foil named Fuchsia Fantasy for this design. Look at how gorgeous it looks in the bottle.


Too bad though, because the effect was very pretty and I will definitely redo this design one day. Just wanted to show you guys that not everything I try turns out great.

Have you ever messed up your nailart?

Xoxo WyoniAlyssa

Tuesday, September 24, 2013

China Glaze Wagon Trail

I totally forgot to upload this post as I didn't  didn't feel like blogging at all due to school, work and some personal matters. But I decided that this blog is my way of expressing my thoughts, feelings and most of all my love for nail polish. 

Therefore I present you one my new loves...

China Glaze's Wagon Trail from their fall 2008 Rodeo Diva collection. I saw this colour years ago, but always forgot to order it. So when I was browsing on eBay again a while ago I decided to finally also order it and I've been in love since. It's absolutely beautiful, a must have and worth searching for. See for yourself..


Wagon Trail has this black base, but on the nails you can clearly see the gold and dark olive through it. I've used two coats and a topcoat to bring out this beautiful colour. 

I just can't stop loving these blackened nail polishes...I absolutely adore them, want and need them all in my collection. They're just that gorgeous and so much better than just a basic black colour. These kind are special, they add this vampy look compared to plain black. Better yet I might just throw away my normal black polish haha.

Do you love these kind of black colours? Do you have some of them in your collection?


Xoxo WyoniAlyssa

Sunday, September 22, 2013

My Birthday Nails

So today is my birthday, couldn’t upload this post earlier as I besides the nail art also had to refill my acrylics. Anyway didn’t really do much today besides that as I got a bad flu and just don’t have the energy for other stuff. Don’t ask me how I will survive this week’s school lessons. Anyway let’s talk nail art.

As I mentioned in one of my previous posts I absolutely love Robin Moses’ nail art designs and I will try to recreate practically all of them. The following is another inspired remake of one of her beautiful designs. Sadly when I finally finished my nails I didn’t have any natural lighting anymore so these pics are not doing this design justice. I’ll try to photograph some new ones tomorrow.


Products used:

  • Hema- Clear polish
  • China Glaze- Sunset Sail
  • Catrice- Miss Piggy Reloaded
  • Inaz- Glam Rock
  • Inaz- Rose Glam
  • MAC- Reflects Gold pigment
  • Essence- Better than Gel nails topcoat
  • Rhinestones

    And of course a picture of my Bday outfit. Wasn't in the mood for special wear, so just a LBD and of course hot heels. 


    Do you like this design?


    Xoxo WyoniAlyssa